


Leave us your email address and be the first to receive a notification when Robin posts a new blog.
The reason why I am writing and presenting about this topic, is to show you that starting is not that difficult. And of course, it is fun to automate or build things, especially if the tasks are click intensive or error prone.
The previous parts of this blog series can be found here:
Part 1 Some basic introduction on API calls and Postman
Part 2 Creating a segment in NSX-T with PowerShell, thru API calls and using PowerCLI
Part 3 Creating a segment in NSX-T with Terraform
So, before we dive into the automating NSX with Ansible. What do we need to know before we get started? Remember this is the getting started series.
Ansible
Ansible is an IT automation engine that allows you to create and maintain a complete infrastructure. Ansible does not require any agents installed on the targets, but it does require SSH or API access. Ansible is a little more difficult to setup and get familiair with compared to Terraform and PowerShell. Though I think it has more possibilities if you want to deploy and maintain your (underlying) infrastructure.
Ansible also works with modules or tasks which are small modules that get send to a target or communicate to the API of the target. On the Ansible website you can already find a lot of information about getting started with Ansible. I am not going to deep into the workings of Ansible since there is a ton of information available on the internet. So, let us get started by building a segment in NSX-T with Ansible and go from there.
Setting up Ansible for NSX-T
Similar to getting to know Ansible, setting up Ansible is also a little more work than Terraform or PowerShell. In our lab I am using an Ubuntu Linux machine, the same as I am using Terraform from.
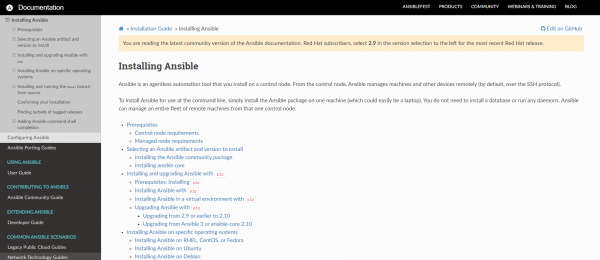
Search for ‘Installing Ansible’ and you will get to this page above. Ansible is available on Windows, macOS and Linux, so click on the OS you are using and follow the instructions.
For Ubuntu they are:
$ sudo apt update
$ sudo apt install software-properties-common
$ sudo add-apt-repository --yes --update ppa:ansible/ansible
$ sudo apt install ansible
Once Ansible is installed we need to do some additional installation to be able to use the NSX-T Ansible Modules. Search for ‘Ansible NSX-T’ and you should get to this page.
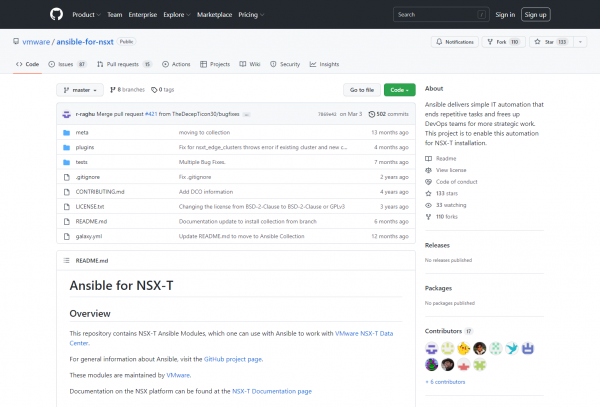
If you scroll a little, you will get to a point where the prerequisites and installation is mentioned. To be able to use Ansible for NSX-T you need to have:
- Ansible >= 2.9.x
- Python3 >= 3.6.x
- pip >= 9.x
- PyVmOmi - Python library for vCenter api.
- OVF Tools >= 4.4.x - Ovftool is used for ovf deployment OVFTool
The installation links are mentioned on the page above and the installation is also described a little further down the page. After the prerequisites have been met, the Ansible for NSX-T collection can be installed using:
ansible-galaxy collection install git+https://github.com/vmware/ansible-for-nsxt
Creating the segment
Now that Ansible is ready, we can start to create our segment in NSX-T. As with the previous parts of this blog I am using an example from the website where I found the documentation. Thus, I am using the test_nsxt_policy_segment.yml example found here.
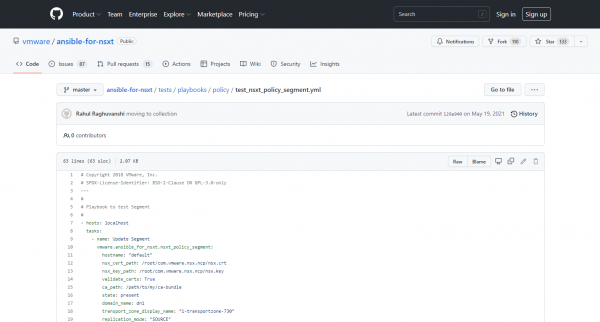
To be able to use this example you need to copy the code into a YAML file on you Ansible server. If you directly use this example in Ansible with the following command:
Ansible-playbook segment-orig.yaml
it will not work unfortunately. To explain this, we will walk through the YAML file.
# Copyright 2018 VMware, Inc.
# SPDX-License-Identifier: BSD-2-Clause OR GPL-3.0-only
---
#
# Playbook to test Segment
#
- hosts: localhost
tasks:
- name: Update Segment
vmware.ansible_for_nsxt.nsxt_policy_segment:
hostname: "default"
nsx_cert_path: /root/com.vmware.nsx.ncp/nsx.crt
nsx_key_path: /root/com.vmware.nsx.ncp/nsx.key
validate_certs: True
ca_path: /path/to/my/ca-bundle
state: present
domain_name: dn1
transport_zone_display_name: "1-transportzone-730"
The first part is comment with a # before it. The playbook starts with – hosts: it needs to run against. In this case the local host, since the local host will be executing the API call against NSX-T. On this local host the following tasks: will be executed. The first task is named -name: Update Segment and uses the Ansible module vmware.ansible_for_nsxt.nsxt_policy_segment:
As you can guess to following 5 lines have to do with connecting to the NSX-T manager and validating the certificates. Similar like we have done in the previous blogs. I have changed them into basis authentication:
hostname: "192.168.136.20"
username: "admin"
password: "R********************!"
validate_certs: False
state: present
But they should reflect your own NSX-T environment. I removed the nsx_cert_path and nsx_key_path since they use certificate-based authentication and for this blog I am using basic authentication to keep it simple. So, I added the username and password values, as described on the overview page. The last line shows the state of the segment we are about to create.
Then there is a lot of information in the example that I find almost too complex to get started with. So, I am using only a few configuration items. If you want to try this, you can comment the lines you do not need with a # or simply remove them. Make sure you do not disrupt the YAML file by adding or removing spaces.
From the state value down, my YAML file now looks like:
state: present
display_name: "Ansible-Test"
domain_name: "default"
transport_zone_display_name: "tstlab-overlay-tz"
replication_mode: "SOURCE"
address_bindings:
- ip_address: "10.1.2.11"
#advanced_config:
#address_pool_display_name: small-2-pool
#connectivity: "OFF"
#hybrid: False
#local_egress: True
admin_state: UP
#connectivity_path: "/infra/tier-1s/d082bc25-a9b2-4d13-afe5-d3cecad4b854"
subnets:
- gateway_address: "40.1.1.1/16"
I deleted the rest of the YAML file since it was not useful for this example. Most values in the YAML file speak for itself, but I do not understand why they did not make the domain name: “default” in the example on the website. Since the default is the only domain present when you install NSX-T.
Once the YAML file has been edited correctly, we can run Ansible-playbook segment-orig.yaml again. If all is working the segment should be created in NSX-T.
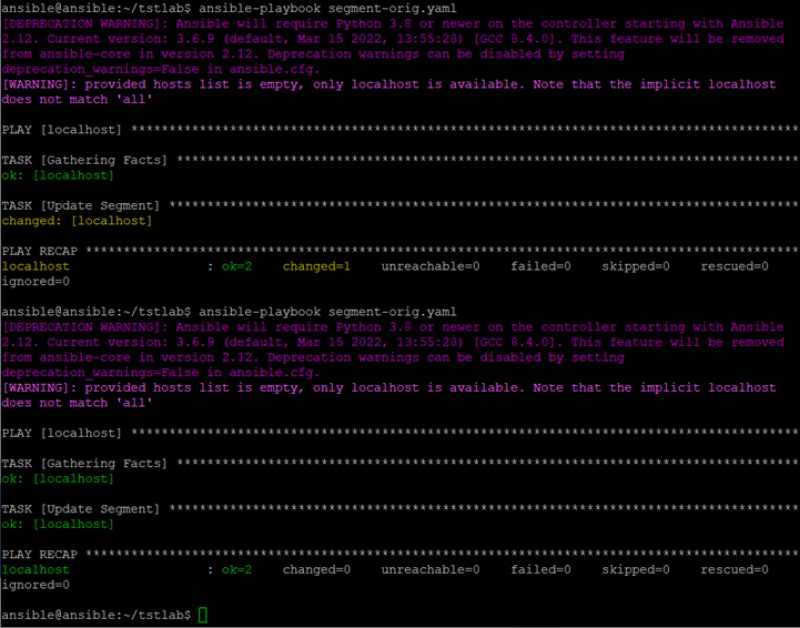
As you can see in the screenshot above, Ansible is Idempotent, meaning that you can run the playbook multiple times. If the segment already exists or does not need to be changed, the playbook simply continues with the next task.
As you may have spotted the password here is also present in the YAML file. Ansible has multiple features and options available to retrieve and store passwords. Including a built-in feature called Vault. But a lot of information is already out there, or it may be fuel for another blog post.
And again, I can show you a screenshot of the segment I have created, but I think it is more fun and educational to try this yourself. That is, it for now. In the next part of this series, I will show the examples and code I used to create a report, with PowerShell, of the segments we created in NSX-T. Hopefully, you have enjoyed reading this blog. If you have any questions or would like to see some more, please leave them at the bottom.
 LinkedIn
 Twitter
Questions, Remarks & Comments
If you have any questions and need more clarification, we are more than happy to dig deeper. Any comments are also appreciated. You can either post it online or send it directly to the author, it’s your choice.