


Leave us your email address and be the first to receive a notification when Team posts a new blog.
For the lab I initially used these instructions and followed them to the tee. After not using the lab for a couple of months I wanted to update my vCenter. It had a functional Tanzu Workload cluster. During the idle time of my lab, several releases of vSphere and Kubernetes came out. This makes updating harder than you might expect. As I found out the hard way. That is why I decided to write a blog about this today. In this blog I will briefly go into updating an out-of-date lab with an enabled Workload Cluster. Then I will show you how easy it is to install a fresh lab and getting the lab up-to-date without too much extra work.
The issue with updating the lab
It is not really an issue to be honest, it is how the update process works and how versions of Kubernetes and TKG is integrated into vSphere with Tanzu. Supported versions of Kubernetes and TKG are tied to vSphere releases. However, releases of TKG are aynchronous to vCenter releases. So remember to read the release notes!
Usually, three versions of Kubernetes are supported. Lets imagine that for vCenter 7.0U3 with TKG 1.5 that is 1.20, 1.21 and 1.22. You are on vCenter 7.0U1 with TKG 1.3 and it might only support versions 1.17,1.18 and 1.19. In this case you cannot upgrade directly from vCenter 7.0U1 to 7.03U3. You will need to do it in phases with a version of Kubernetes that overlaps. Also, you will need to upgrade your Workload Cluster before proceeding to the next step. Basically, it looks like this:
- Check compatibility of the TKG Cluster, if applicable, and upgrade if necessary
- If necessary: Upgrade Workload Cluster to Kubernetes version also supported for vCenter 7.0U2
- Upgrade vCenter (and hosts) from 7.0U1 to 7.0U2
- Upgrade Workload Cluster to version of Kubernetes version also supported for vCenter 7.0U3
- Upgrade the TKG Cluster, if applicable
- Upgrade vCenter (and hosts) to 7.0U3
- Upgrade Workload Cluster (optional)
This is time consuming and might get complicated. Also, results might vary. It’s great for study purposes, but not for setting up a lab quickly. If you want to go that way, read more about it here.
Set up the lab and make it up-to-date
Personally, I came to the conclusion that it is much easier to install a fresh lab. Making sure it is up-to-date from the start. Then update the lab on a regular basis. If necessary it is also super-easy to recreate the lab. For this lab I am still using the Lab from William Lam as my starting point. I will show you the steps that you will need to take to make your installation the ‘latest and greatest’ in a reasonably fast way.
Initial setup
Make sure you meet all the requirements. Be aware that not all downloads and licenses are freely accessible. See the FAQ on how to obtain licenses if you do not have them. You can find requirements and instructions here.
Take some time to fill out the script and save it. This will make re-deploying super easy. Once satisfied, run the script and wait till it is done. Make sure it finishes without errors. When done you should have a vApp in your vCenter with the nested lab. Test if you can access it, BUT DO NOT ENABLE WORKLOAD MANAGEMENT!
Config
- Before running the script, I changed the $NestedESXiCapacityvDisk variable to 400
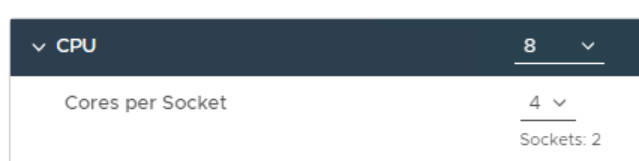
This made more sense in combination with the Content Library - After running the script, I changed the CPU setting from 8 sockets to two sockets
This resembles a standard ESXi host and it saves licenses. Licenses usually go per socket. This brings the cluster from using 24 back to 6 sockets.
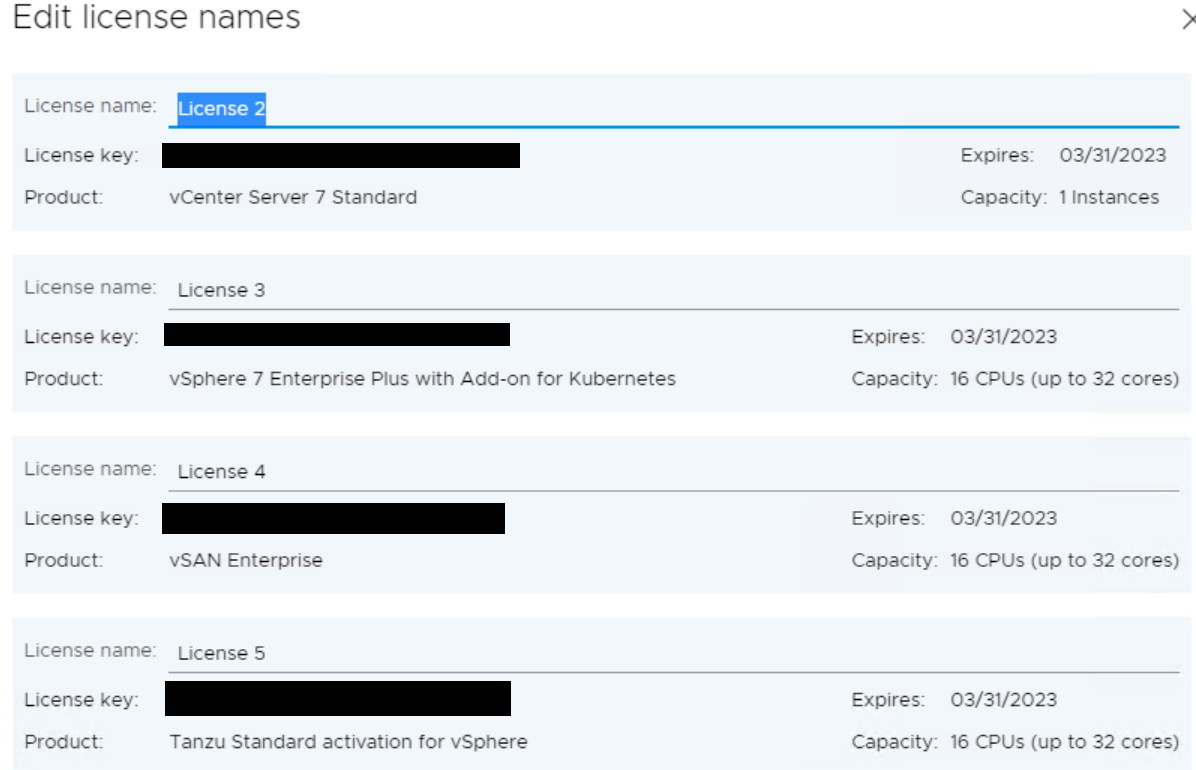
- Added licenses for vCenter, ESXi and vSAN
- I like to wait until the Content Library is fully synced before proceeding (see you vSphere tasks)
Upgrade vCenter
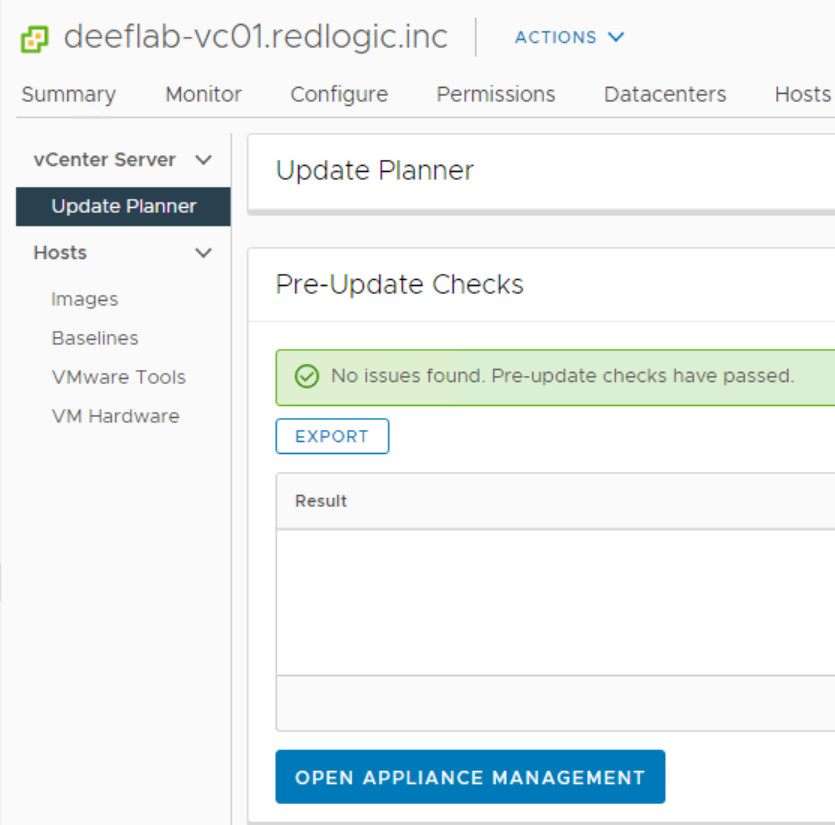
With this in place it is time to upgrade vCenter. Just follow the normal procedure. Do a pre-check, if all is okay go to the appliance and remediate to the latest version of vCenter 7.0U3. And wait. This might take quite a long time in my experience. Especially the last part of the process took very long, but just be patient and let it finish.
Upgrade ESXi
Once the vCenter upgrade is completed, the ESXi hosts can be upgraded.
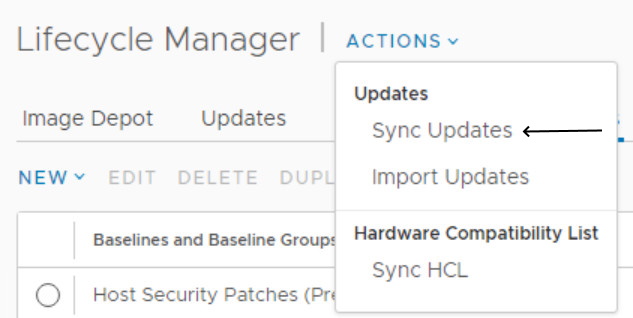
- Go to the Lifecycle Manager and make sure the repository is synced. This will make sure that you have all the files necessary for an ESXi upgrade.
- The cluster already has 3 predefined baselines attached. Just select all three and remediate. This should bring your hosts to the corresponding ESXi version.

- Make sure all ESXi hosts are upgraded before proceeding
Workload Management
With vCenter and the ESXi hosts upgraded, it's now time to enable Workload Management and create a Supervisor cluster.
Go to the Workload Management page and get started. The UI has slightly changed from the UI shown on the page of William Lam. I will just show you the parts that need some explanation.
Installation
Note that networks and clusters were auto-created with the William Lam script. Below values and examples are taken from my own lab.
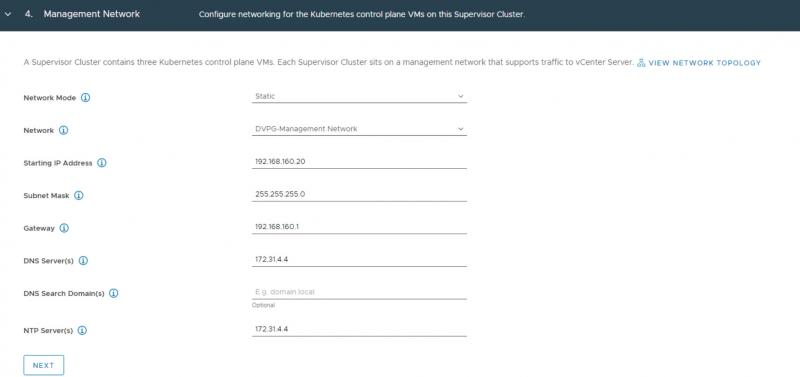
- Range 192.168.160.0/24
- DNS and NTP 172.31.4.4
- DVPG-Management Network
- 5 available IP adresses (192.168.160.20-192.168.160.24)
- 1 control plane
- 3 worker nodes
- 1 spare for updating purposes
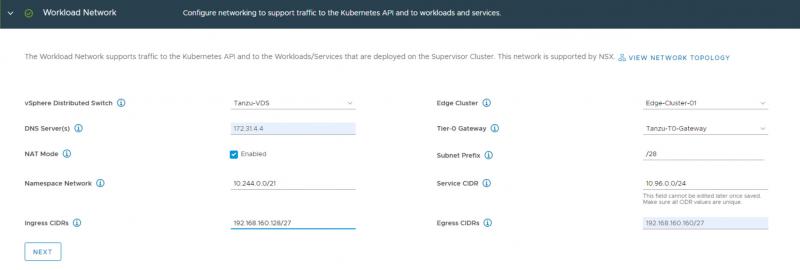
- Tanzu-vDS
- Edge-Cluster-01 (nsx-t)
- Tanzu-T0-Gateway (nsx-t)
- CIDR range for ingress 192.168.160.128/27
- CIDR range for egress 192.168.160.160/27
It's a small lab, but it provides enough resources to do some simple testing and playing around. Make sure everything is filled out according to your own IP plan. Once filled out it should look like this:
Also add the content library and leave the control plan size settings to small.
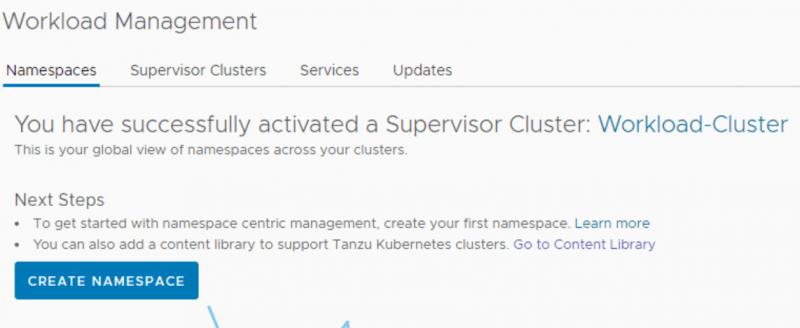
I did not fill out any optional fields. Remember though that when your domain name is ".local", you might need a DNS Search Domain. This is because by default ".local" domain names are not routed to DNS servers. That means in such cases you will explicitly need to define search or routing domains. Read more about it in this KB article. Now review and click finish to start the installation. This might take a little time, so be patient. Eventually the Config Status on the Workload Management page should turn green. It might be necessary to refresh the page to see the status change.

As you can see, we are now on Kubernetes version v1.22.6, which is currently the latest supported in the version of vSphere. The control plane node got an address and there are three hosts in the Workload Cluster. Now click on Namespaces and create a namespace. You may create the 'Yelb' namespace used in the William Lam instruction. If you want to run the Yelb app in a different namespace, you will need to modify the script and run it from a local location (or your own Git repo).
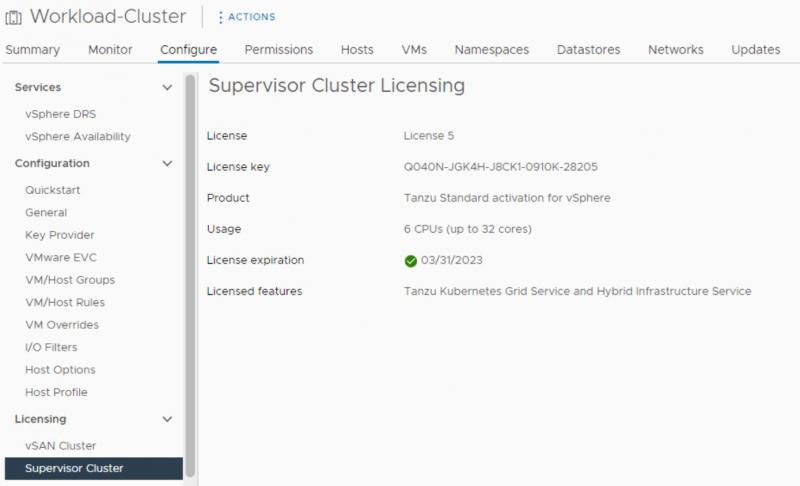
Now go back to the Supervisor Clusters tab and click on Workload Cluster. This will take you to the cluster. Assign the license under Configure -> Licensing -> Supervisor Cluster.
Configuration
Some additional configuration is necessary to make vSphere pods work. I will show you the basic configuration necessary.
Remember that running vSphere Pods is not the same as running pods in Tanzu Kubernetes Grid (TKG). How to get TKG up and running will be the focus point of my next blog.
In your Hosts and Cluster overview go into the Workload Cluster and click on your namespace. The summary tap will show you some configuration options.
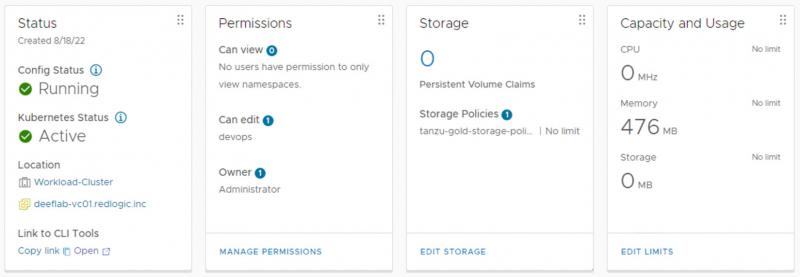
- In the Status view under 'Link to CLI Tools' click open
- download the package and extract it
- this is your kubectl location, for ease I would recommend to put it in your PATH variable
- In the Permissions view click Manage Permissions
- add the local administrator as owner
- add the devops user (created by script) as editor
- In the Storage View click Edit Storage
- add the tanzu-gold-storage-policy
Now you should be able to login to the supervisor cluster with this command and then connect to the desired context.
note that if your folder with kubectl is not in PATH you should cd into that folder and use ./kubectl
PS C:\mydir> kubectl vsphere login --server=192.168.160.130 -u administrator@vsphere.local --insecure-skip-tls-verify
PS C:\mydir> kubectl config use-context demo-space (or your own namespace)
When this is done you need to set a network policy. I like to do this on all namespaces I create. Create a YAML file from the code below. Name it 'enable-all-policy.yaml'. When done, apply it.
apiVersion: networking.k8s.io/v1
kind: NetworkPolicy
metadata:
name: allow-all
spec:
podSelector: {}
ingress:
- {}
egress:
- {}
policyTypes:
- Ingress
- Egress
Conclusion
At this point you will have your environment ready to use with vSphere Pods. You can execute the Yelb script which is mentioned on the page of William Lam. I will not go into this today because my main goal was to show you how to setup and prepare an up-to-date lab for vSphere with Tanzu.
So what about Tanzu Kubernets Grid (TKG)?
The lab is now almost ready to deploy a TKG cluster. Configuring TKG requires some additional steps. Also, I would like to show you how to use pods in TKG. On top of that, there are some things you need to take into consideration when using TKG.
More on all of this in my next blog.
Comments
If you have questions, comments or points of improvement. Please feel free to reach out.
Hope you enjoyed reading and till next time!
 LinkedIn
 Twitter
Questions, Remarks & Comments
If you have any questions and need more clarification, we are more than happy to dig deeper. Any comments are also appreciated. You can either post it online or send it directly to the author, it’s your choice.