


Leave us your email address and be the first to receive a notification when Robin posts a new blog.
The reason why I am writing and presenting about this topic, is to show you that starting is not that difficult. And of course, it is fun to automate or build things, especially if the tasks are click intensive or error prone. The first part of this blog series can be found here: Some basic introduction on API calls and Postman
So, before we dive into automating NSX with PowerShell. What do we need to know before we get started? Remember this is the getting started series.
PowerShell
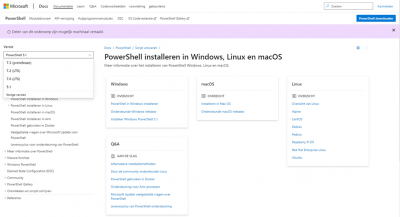
By default, PowerShell is available on almost all windows OS'es, but PowerShell is also available for Linux and macOS. Although there are multiple versions available for download. I try to build my scripts, so they are compatible with version 5.1 because that version is available in most places.
PowerShell needs modules and functions to be able to automate against NSX. For NSX-V PowerNSX has been created by the community and is the most widely used PowerShell module for automating or scripting against NSX-V. Unfortunately, for NSX-T there is no PowerNSX module available. For NSX-T there are two options. Either use direct API calls (RestMethod) from PowerShell or use the commands VMware has built into PowerCLI. Both options can do the same, but work in a different manner. It is up to you which you prefer.
Rest API method
The Rest API method in PowerShell has many similarities with running API calls in Postman. This is one of the main advantages of this method of working. See part one of this series.
As shown in the first part of this series we can look up the API call for creating a segment in NSX-T. And with the correct body in the API call to NSX-T, we can create a segment.
The way of working in PowerShell is very similar. First, we need to connect to NSX-T and verify (or ignore) the certificates. For this I have borrowed some code from my colleague Robert in his blog about retrieving information from NSX-T load-balancers. I just added some lines to set the NSXmanager, the NSXuser and request the password as secure string.
add-type @"
using System.Net;
using System.Security.Cryptography.X509Certificates;
public class TrustAllCertsPolicy : ICertificatePolicy {
public bool CheckValidationResult(
ServicePoint srvPoint, X509Certificate certificate,
WebRequest request, int certificateProblem) {
return true;
}
}
"@
[System.Net.ServicePointManager]::CertificatePolicy = New-Object TrustAllCertsPolicy
[System.Net.ServicePointManager]::SecurityProtocol = [System.Net.SecurityProtocolType]'Ssl3,Tls,Tls11,Tls12'
function createSession {
$script:session = New-Object Microsoft.PowerShell.Commands.WebRequestSession
$script:headers = @{}
$script:nsx_uri = "https://" + $nsxManager + "/"
$uri = $nsx_uri + "api/session/create"
$private:body = "j_username=$($nsxUsername)&j_password=$($nsxPassword)"
try {
$response = invoke-webrequest -contentType "application/x-www-form-urlencoded" -WebSession $session -uri $uri -Method 'POST' -Body $body -usebasicparsing -Erroraction Stop
$xsrftoken = $response.headers["X-XSRF-TOKEN"]
$response
$script:loginSuccess = $true
$script:headers.Add("X-XSRF-TOKEN", $xsrftoken)
$script:headers.Add("Accept", "application/json")
$script:headers.Add('Content-Type','application/json')
}
catch {
Write-Host "Failed" -ForegroundColor Red
Write-Host "$($_.Exception)" -ForegroundColor Red
write-host "Error Details:" $_.ErrorDetails.Message -ForegroundColor Magenta
$script:loginSuccess = $false
}
}
$nsxManager = "192.168.136.20"
$nsxUsername = "admin"
$password = Read-Host -Prompt "Input the the NSXT $nsxUsername password" -AsSecureString
$nsxPassword =[Runtime.InteropServices.Marshal]::PtrToStringAuto([Runtime.InteropServices.Marshal]::SecureStringToBSTR($password))
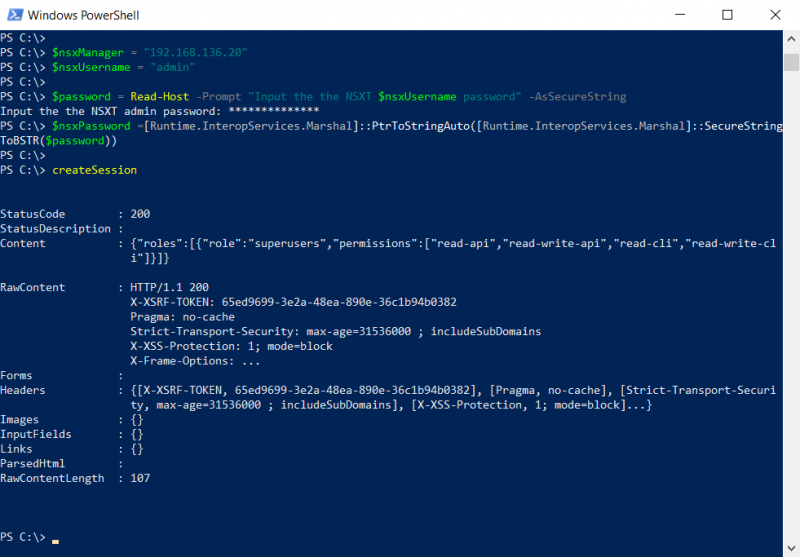
createSession
If you execute this code in PowerShell, after you adjusted the address of the NSX manager, you should see the following output. This output is shown because in the code there is a $response that displays the response from the API call.
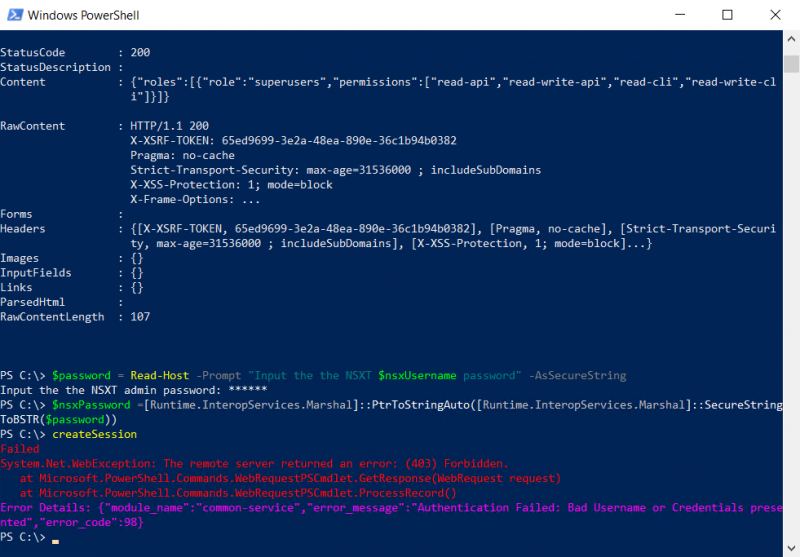
If you have mistyped the password for example, the code returns the error message. This is because a try-catch function is used if the API call fails, the catch part is triggered. The following code displays the returned error. These error messages can be very helpful in troubleshooting the code.
write-Host "$($_.Exception)" -ForegroundColor Red
write-host "Error Details:" $_.ErrorDetails.Message -ForegroundColor Magenta
$script:loginSuccess = $false
The error looks like this:
Once the connection has been successfully setup. It is time to create the segment.
We already know the API call for creating or updating the segment, since we already used it in the first part of this series. There we also used this JSON code in the body to create the segment.
{
"display_name": "API-Test",
"subnets": [
{
"gateway_address": "40.1.1.1/16"
}
],
"connectivity_path": ""
}
The first step now is to create the same JSON code in PowerShell. Again, as always there are various methods, but this is one I can understand.
First, we need to give the segment a name or id $SegmentID = 'Powershell-API-Test'.
Then we can start to declare the body $body = @{}
We can add values to the base of the body with $body.Add("display_name",$SegmentID)
As shown in the JSON above, the value subnets is an array with multiple values. Here we will be working from the inside out.
To start, we create the value for the gateway_address
$GatewayAddr = @{"gateway_address"="30.1.1.1/16"}
Which is the same as:
$GatewayAddr = @{}
$GatewayAddr.add("gateway_address"="30.1.1.1/16")
But since it is only one value, we can make a one-liner out of it.
Next the value needs to be added to an array.
$Arrsubnets = New-Object System.Collections.ArrayList
$Arrsubnets.add($GatewayAddr)
And the array needs to be added to the body as a value for subnets.
$body.Add("subnets",$Arrsubnets)
Once all the information is present the body can be converted to JSON.
$body = $body | ConvertTo-Json -Depth 10
The -Depth parameter specifies how many levels are included in the JSON. This parameter is required because by default it is only 2. Although a warning is displayed if the number of levels is exceeded, it is better to have it present.
Another great troubleshooting feature is to use Out-File ".\body.json" to export the body to a JSON file. This JSON file can then be used to test it in Postman. That way you can validate if the code for creating the JSON is valid and that the JSON works.
All that is left in our code is to define our API call.
$patchSegmentURL = “https://$nsxmanager/policy/api/v1/infra/segments/$SegmentID”
And use a similar try-catch function which will result in the following code:
$SegmentID = 'Powershell-API-Test'
$patchSegmentURL = “https://$nsxmanager/policy/api/v1/infra/segments/$SegmentID”
$body = @{}
$body.Add("display_name",$SegmentID)
$body.Add("connectivity_path","")
$GatewayAddr = @{"gateway_address"="30.1.1.1/16"}
$Arrsubnets = New-Object System.Collections.ArrayList
$Arrsubnets.add($GatewayAddr)
$body.Add("subnets",$Arrsubnets)
$body = $body | ConvertTo-Json -Depth 10 #|Out-File ".\body.json"
try {
$response = Invoke-restmethod -headers $global:headers -uri $patchSegmentURL -Method 'PATCH' -body $body -Erroraction Stop
}
catch {
Write-Host "Failed" -ForegroundColor Red
Write-Host "$($_.Exception)" -ForegroundColor Red
write-host "Error Details:" $_.ErrorDetails.Message -ForegroundColor Magenta
break
}
Saving both pieces of code to a file and running it will look like this:
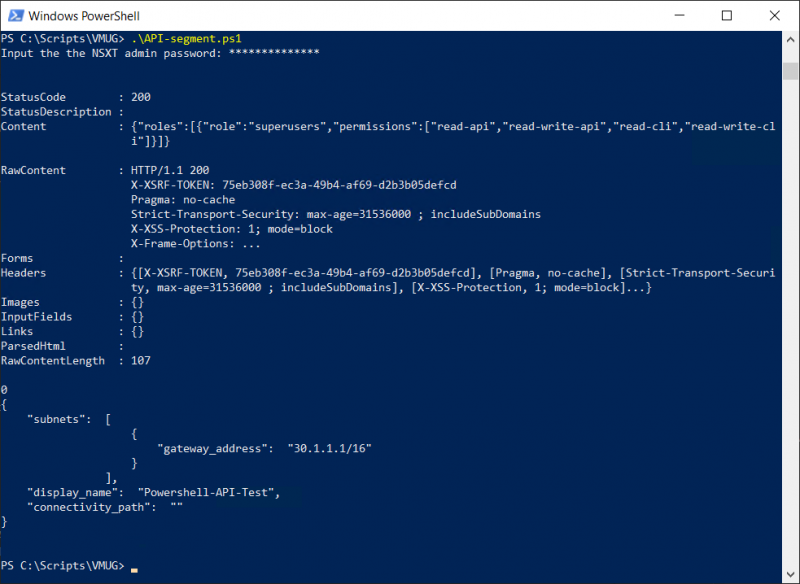
And of course, the segment is visible in NSX. I can show you a screenshot, but maybe it is better to try to alter the JSON file and test or play around with it yourself.
PowerCLI
The second option to script or automate against NSX-T is to use PowerCLI. In recent versions of PowerCLI there are a few functions available that can be used to automate against NSX-T.
To connect and disconnect Connect-NsxtServer and Disconnect-NsxtServer can be used. But the function you will use most is Get-NsxtPolicyService. This function functions as a proxy against the NSX-T API service.
The method of connecting to NSX-T is much simpler to setup, but takes a little longer to connect. This is because the PowerCLI function builds a list of services or commands that can be used against the specific installation of NSX-T. Therefore, the time it takes to connect to NSX-T is dependent on the resources available on the NSX-T manager and on the host where the PowerCLI function is started.
To connect to NSX-T simply run Connect-NsxtServer -Server <NSX-T manager> and enter the username and password.
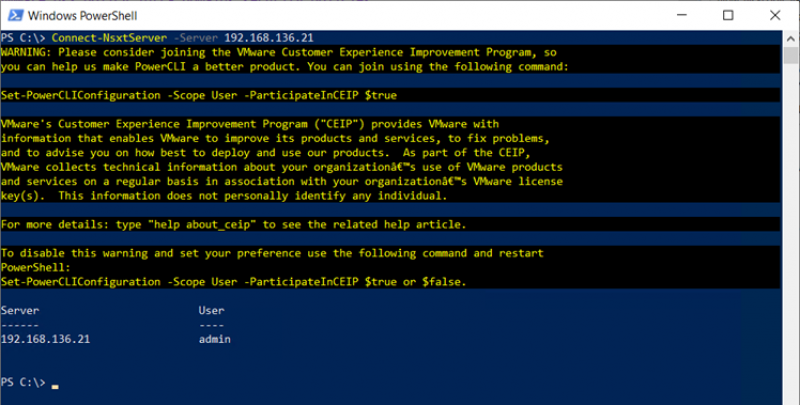
Once a connection has been made. We can use Get-NsxtPolicyService to list the various services or commands. These are like the API calls listed in the NSX-T API guide.
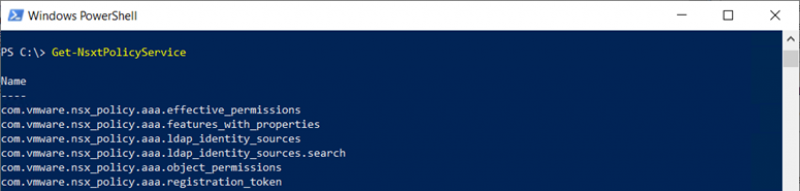
The list can be narrowed down by searching for a piece of the name Get-NsxtPolicyService -Name *segment*. But segment is in the name of a lot of API calls, so that does not help very much. In this case it is better to export the complete list to a text file and compare it with the API guide. Then you will see that com.vmware.nsx_policy.infra.segments is the service or command we need to use.
Running Get-NsxtPolicyService -Name com.vmware.nsx_policy.infra.segments will allow us to run the basic operations against NSX-T for that specific service. This is similar to the basic operations in the API call. But on its own, it's not very useful. If we put it in a string, we can make more use of it.
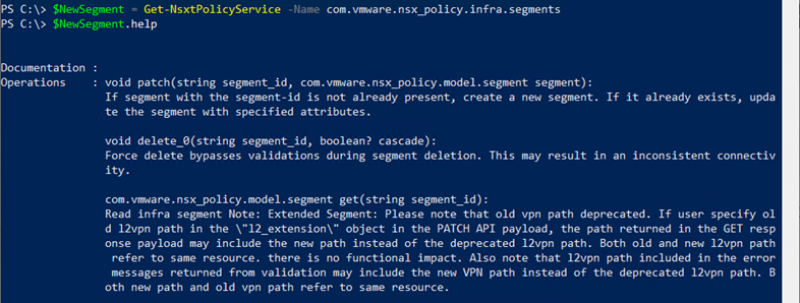
For example, we can retrieve the documentation from this service with:
$NewGegment = Get-NsxtPolicyService -Name com.vmware.nsx_policy.infra.segments
$NewGegment.help
And with the Get-Member function we can retrieve the list of operations that we can perform with this service and the input that is required to perform these operations.

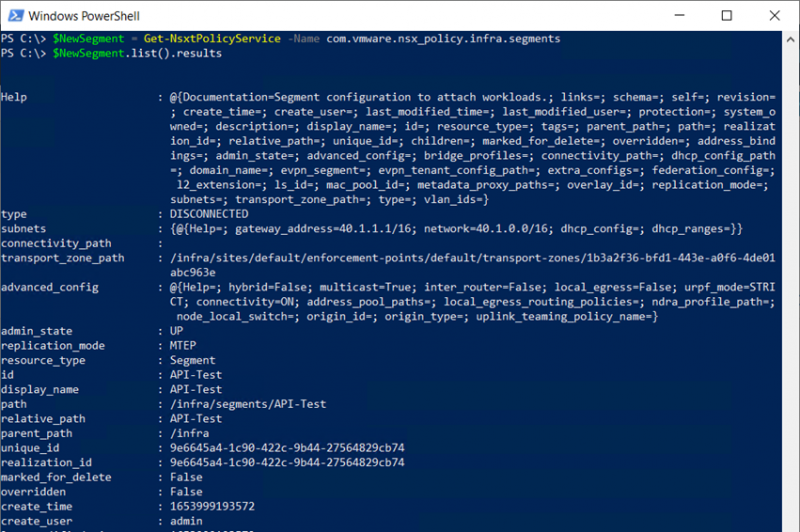
As you can see there is a list operation, we can use to list all the segments. That operation returns a result that contains all the segments. So, to view a list of all the segments we can use $NewSegment.list().results to view all the available information about the segments or we can use $NewSegment.list().results.display_name to only list the display name of all the segments.
Now that we can retrieve the information about the segments it is time to create one with this way of working. This can be done with a similar Patch operation. If we scroll a little bit back in this blog we can see the patch operation requires:
patch(string segment_id, com.vmware.nsx_policy.model.segment segment)
The segment id is a GUID or simply the name we give to the segment, but the second part needs to hold the information about the segment. Like the body in the API call.
In my VMUG presentation I created a VLAN backed segment, so I will be showing the same segment here.
To begin, we will define the id or name of the segment $Segmentid = "Powershell-Test"
To hold the specification about the segment we use
$NewSegmentSpec = $NewSegment.Help.patch.segment.Create()
And to the $NewSegmentSpec we add the settings we want the segment to use. In our case we want it to have VLAN 123 and a VLAN backed Segment must be part of a Transport zone. The setting for the Transportzone can be retrieved using the List() method, by looking at a Segment with the same Transportzone.
$VLANs = @('123')
$transportZone = "/infra/sites/default/enforcement-points/default/transport-zones/0350d3c5-6e7c-4dbf-abe8-c7852b50b2b3"
$NewSegmentSpec.id = $Segmentid
$NewSegmentSpec.vlan_ids = $VLANs
$NewSegmentSpec.transport_zone_path = $transportZone
And to create or update the segment we run $NewSegment.patch($Segmentid, $NewSegmentSpec)
Since this is a Patch method, we can simply adjust the VLAN array and run it again if required.

Again, I can show you a screenshot of the segment I have created, but I think it is more fun and educational to try this yourself. In the next part of this series, I will explain some of the basics about Terraform and how to use it against NSX-T. Hopefully, you have enjoyed reading this blog. If you have any questions or remarks, please leave them at the bottom.
 LinkedIn
 Twitter
Questions, Remarks & Comments
If you have any questions and need more clarification, we are more than happy to dig deeper. Any comments are also appreciated. You can either post it online or send it directly to the author, it’s your choice.