


Leave us your email address and be the first to receive a notification when Robin posts a new blog.
As the title of this blog already suggest this blog will show the steps to enable or install IDS/IPS in NSX-T. If you have missed the overview of NSX-T IDS/IPS or wish to jump directly to another part, you can do it here:
- NSX-T IDS/IPS overview
- NSX-T IDS/IPS installation (this blog)
- NSX-T IDS/IPS creating rules
- NSX-T IDS/IPS testing
- NSX-T Event forwarding
NSX-T IDS/IPS Installation
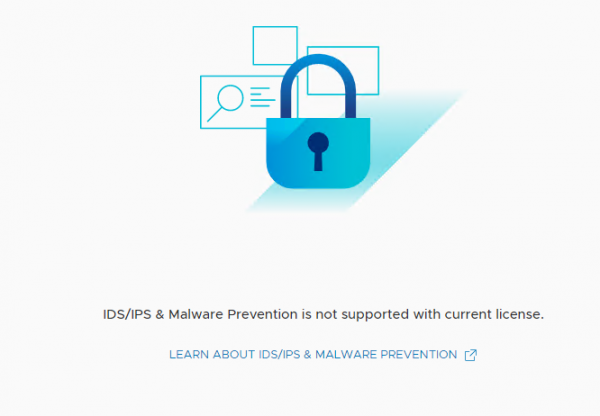
To enable or Install IDS/IPS in NSX-T you need to have NSX-T up and running. In our Lab I have a single NSX-T manager running with a vSphere cluster prepared for NSX-T (Networking & Security). I don’t have a Security Only prepared cluster in our Lab, but IDS/IPS should work the same on both. The next step is to have the correct license key, otherwise you see something like this when you select Security > IDS/IPS & Malware Prevention
After updating the license there is no need to restart any services or the NSX manager(s). In our Lab I’m using the NSX Data Center Evaluation license, and I do not have the NSX Application Platform (NAPP) installed. Once the correct license has been entered the option to enable or install IDS/IPS becomes available.
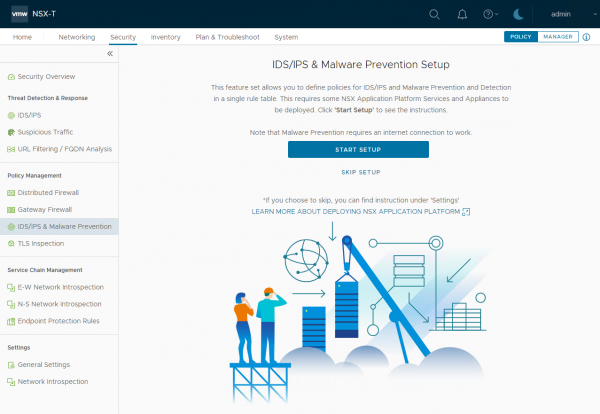
You can use the Start Setup button to begin the installation. The steps and tabs are like configuring it without the wizards. The wizards will just show you the steps or tabs in the correct order.
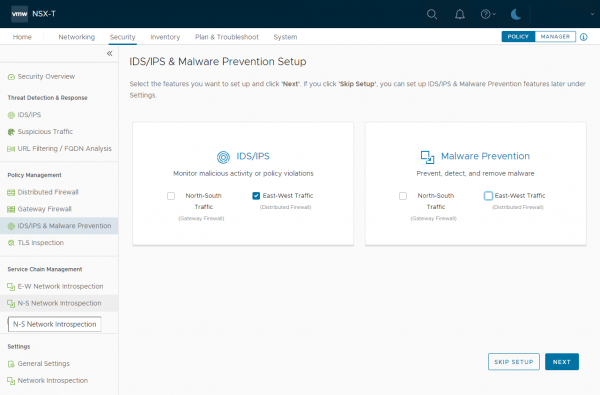
I am interested in the Distributed IDS/IPS feature. So, for now, I’m only selecting East-West Traffic under IDS/IPS. Depending on the options you have selected, different steps will be presented to you. For reference, the different steps can be found in the NSX-T 3.2 documentation.
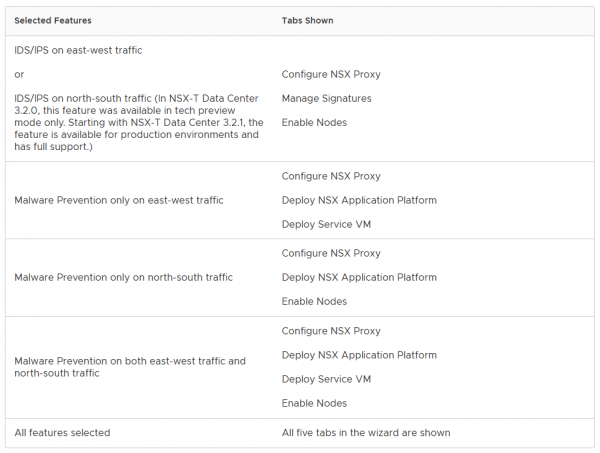
If you want to know how to install it without the wizard, you can use this table to enable the features separately. Since I have selected only East-West Traffic, the wizard first asks me to configure the NSX Proxy server.
NSX proxy server
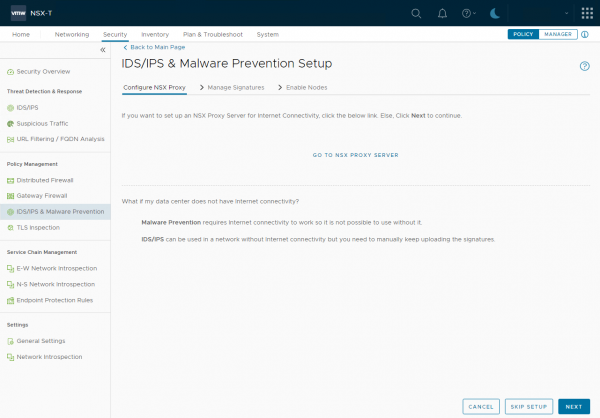
For the distributed IDS/IPS the NSX proxy server is optional. If you don’t have a direct internet connection on your NSX-T environment, you use a NSX Proxy server (if available) or can skip this step. The signatures can also be uploaded manually, for when your environment is completely separated from the Internet.
The NSX proxy server can be later configured under System > General System Settings > Internet Proxy Server
Since we have an internet connection in our lab environment, I will skip this step and click Next
The next step is to upload the signatures manually or download them from the internet.
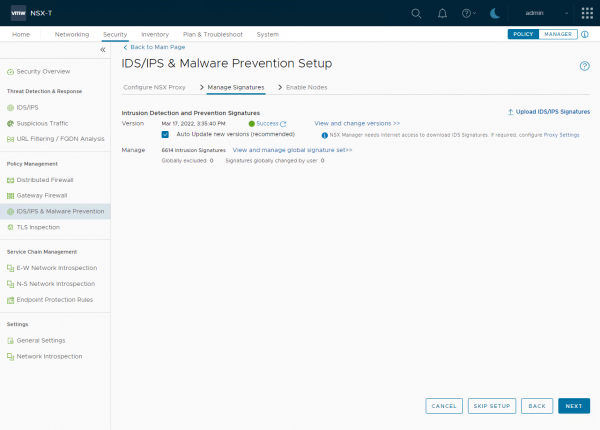
If you have a direct internet connection or have configured the NSX proxy server correctly the signatures will update automatically. Or you can upload them manually here. It is also possible to upload them later under Security > IDS/IPS & Malware Prevention > Settings >IDS/IPS.
With my Evaluation license the IDS/IPS functionality can be enabled, but it does not seem to update signatures. As you can see in the screenshot, the signatures are still from March last year. I checked this a couple of days after enabling the IDS/IPS functionality and the signatures didn’t update. So, you can test IDS/IPS with the NSX Evaluation license, but only with the signature that is currently available in the environment, I’m not sure if that is the signature that comes with the installer of the signature that is downloaded when NSX is installed.
Before clicking Next, I have selected the Auto Update new versions, to have a daily update of available signatures. Although the update does not seem to work with the Evaluation license.
The next step is to enable IDS/IPS on the Transport nodes:
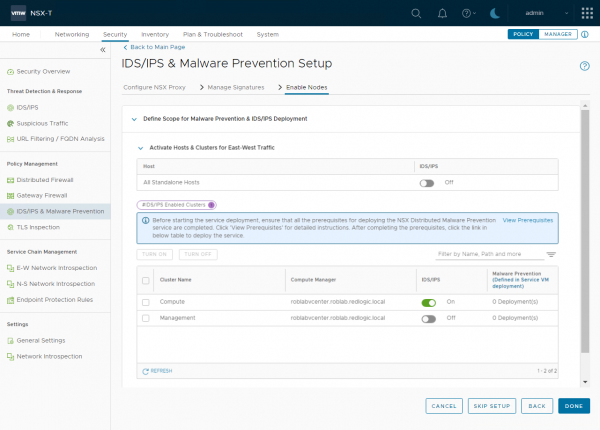
For my lab environment I’m only enabling it for my Compute cluster. This makes distributed IDS/IPS available for the VM's on that cluster. It doesn’t mean IDS/IPS is enabled for every VM in that cluster.
The clusters can be enabled or disabled at a later stage by going to Security > IDS/IPS & Malware Prevention > Settings > Shared and changing the settings under Activate Hosts & Clusters for East-West Traffic
And finally click Done to finish the wizard.
Verifying the installation
We can also check the status of the IDS from the NSX command line using get ids status and get ids profile:
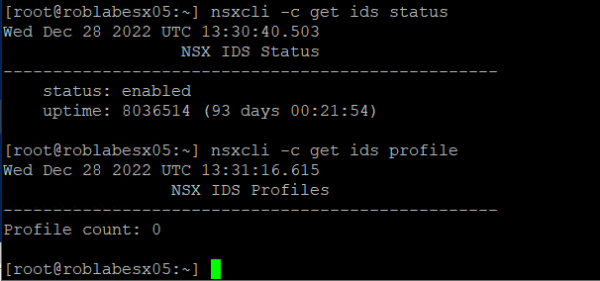
As you can see the status is now enabled, but no profiles have been configured yet. This is because no rules have been created and applied to VM's.
The next step is to enable IDS/IPS for specific VM's in your environment. This can be done using rules as I will show in the next blog post NSX-T IDS/IPS creating rules
Hopefully, you have enjoyed reading this blog. If you have any questions or would like to see some more, please leave them at the bottom.
 LinkedIn
 Twitter
Questions, Remarks & Comments
If you have any questions and need more clarification, we are more than happy to dig deeper. Any comments are also appreciated. You can either post it online or send it directly to the author, it’s your choice.