Leave us your email address and be the first to receive a notification when Robin posts a new blog.
As said with version 3.2 of NSX-T the feature to use external access logs from Global Protect and Clearpass were introduced. Since we have a Palo Alto Firewall in our lab, I’m demonstrating this feature with Global Protect. This feature makes it possible to allow or deny traffic in the NSX distributed firewall based on the user that is logged in to the environment using a Global Protect VPN (or thru ClearPass).
The flow for this feature is relatively simple. A user logs on to the Palo Alto firewall with a Global Protect client. The access logs are forwarded to vRealize Log Insight (or VMware Aria Operations for Logs as it is now called). vRealize Log Insight analyzes and processes the logs. Only the relevant information is forwarded to NSX. NSX uses this information to translate a user as member of an Active Directory group the IP-address of the Global Protect session.

As a starting point I have a working Palo Alto 10.2.2 with Global Protect, a Log Insight 8.8.2 and a NSX 3.2.0.1 environment. As said this feature is introduced in NSX-T 3.2.x and requires at least vRealize Log Insight 8.6 and later. I didn’t find a specific Palo Alto or Global Protect version. If the log format remains the same the solution will work. But more on this later.
Enable logging from Palo Alto to Log Insight
The first step is to configure the Palo Alto to forward the log files to Log Insight. For this you need a Syslog Server Profile which can be created under Device > Server Profiles > Syslog
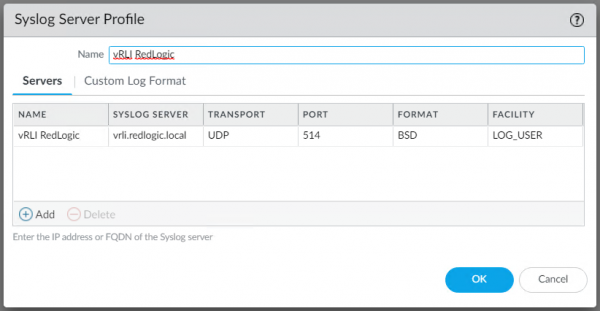
This profile can be used to send the log file via Syslog to Log Insight. My first guess was to forward the Global Protect log, but that didn’t work as expected. Looking at the example logs in the documentation I found the User-ID logs needed to be forwarded. Device > Log Settings > User-ID
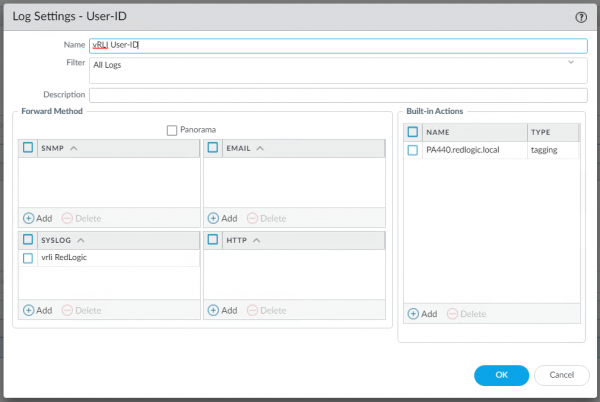
I also added the tagging, but I don’t think that is required. Once the settings have been added, the configuration needs to be committed. When the configuration is working, and a new user has made a connection thru Global Protect, the logging should appear in Log insight.

Enable NSX Identity Firewall integration in Log Insight
The next step is to enable the processing and forwarding of the logs from Log Insight to NSX. In Log Insight this can be done under Integration. At least in version 8.8. The documentation on the VMware Docs describes the steps for version 8.6, but they are relatively identical.
First configure the connection to the NSX Manager under Integration > NSX Identity Firewall > NSX Manager Configuration
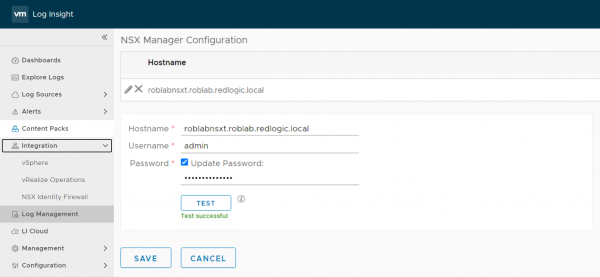
The next step is to add the provider. The provider analyzes the logs from a specific source and sends the information to the configured NSX Manager. Fortunately, the Regex information is filled when you select the provider type. Integration > NSX Identity Firewall > Provider > + New Provider
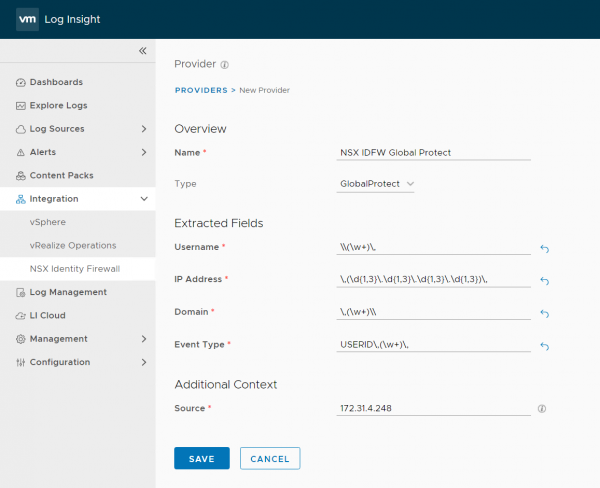
Make sure you set the correct Source, since only the logs for those Sources are being analyzed by the provider. The Source can be found by clicking on the source field on one of the logs send from the Palo Alto.

The next step is to configure NSX to be able to use this information in the Identity based Firewall.
Configure NSX Identity Firewall with Global Protect in NSX
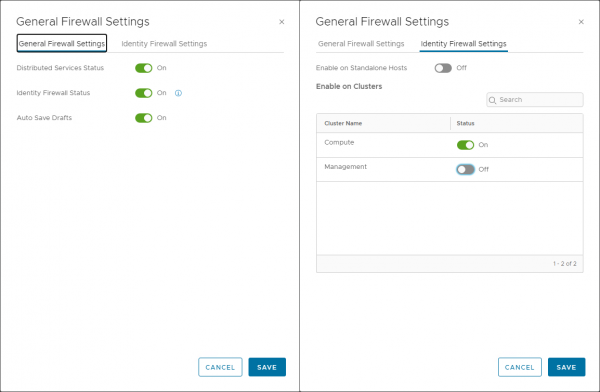
To enable the Identity based Firewall in NSX and get rid of the annoying banner that reminds you it is disabled (which finally can be disabled in NSX-T 4.x). You go to Security > Distributed Firewall > Actions > General Settings (at least in 3.2.0.x)

On the General Firewall Setting tab you can turn Identity Firewall Status On. On the Identity Firewall Settings tab, you can enable the identity-based firewall per cluster or for standalone hosts. Here I am only enabling it for the Compute cluster in our lab.
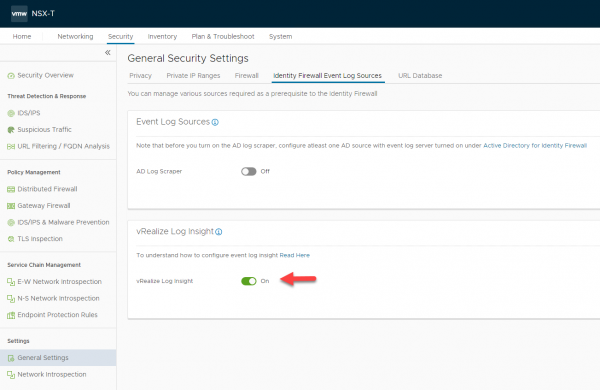
The second step in this process is to enable the integration with vRealize Log Insight. This can be done under Security > Distributed Firewall > Settings > General Settings > Identity Firewall Event Log Sources > vRealize Log Insight
Turn the vRealize Log Insight integration on.
The last step on the NSX manager is to add the connection to the Active Directory. This is pretty straightforward. So, I am giving you the short description here.
On the NSX Manager go to System > Identity Firewall AD and add an Active Directory with one or more LDAP connections.

Now that the configuration of the components is complete it is time to create a firewall rule and check if our configuration works.
Creating an identity-based firewall rule in NSX
The process of creating an identity-based firewall rule is the same as creating a normal firewall rule. Except that the source group is filled with an Active Directory group. In NSX I have created a test group with an active directory group as member.
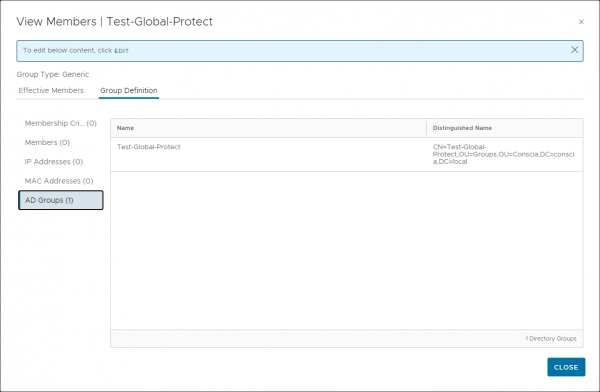
With this group I have created a firewall rule to disable access for the security group towards a specific VM. Which a member of the destination security group.

Time to test the setup
When a user logs on thru Global Protect, the user-id log is sent to Log Insight. There, the log is analyzed and specific information is forwarded to NSX-T.
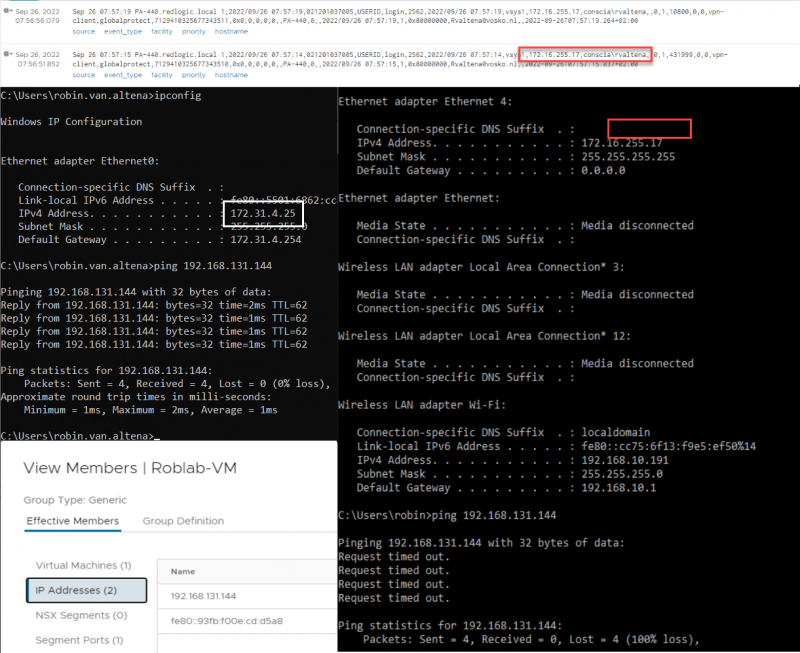
In the combined screenshot below you can find the following information to see that the setup works:
- On top the Global Protect log in to Log Insight, where you can see that my Conscia user rvaltena is logged on to Global Protect and has been assigned IP-address 172.16.255.17.
- On the right you can see that from IP-address 172.16.255.17 I am unable to ping the IP-address 192.168.131.144 assigned to the test VM, which is member of the security group Roblab-VM used as destination in the firewall rule.
- On the left a ping from a stepping-stone in our lab with IP-address 172.31.4.25 where I am logged on with a local account. From there I can ping the test VM.
- And finally on the bottom left a screenshot showing the IP-address of the VM in the security group Roblab-VM.
Of course, this is the happy flow where everything works in the first go. Unfortunately, that wasn’t the case for me. In the second part of this blog, I’ll show some troubleshooting examples to trace where the setup might go wrong.
Hopefully, you have enjoyed reading this blog. If you have any questions or would like to see some more, please leave them at the bottom.
Questions, Remarks & Comments
If you have any questions and need more clarification, we are more than happy to dig deeper. Any comments are also appreciated. You can either post it online or send it directly to the author, it’s your choice.


 LinkedIn
 Twitter