


Leave us your email address and be the first to receive a notification when Robin posts a new blog.
VMware has introduced Multi-Tenancy into the NSX GUI using Orgs and Project. If you already have some knowledge about the Policy object or read one of my previous blogs. You know that by default all policy objects are located under the ‘infra’ tree in the API structure. NSX 4.x introduces the ‘Org’ folder next to ‘Infra’. Within or beneath ‘Org’ a different project can be made (see picture above). But maybe that’s starting a little too deep into the way VMware has implemented this feature. Let’s take a few steps back.
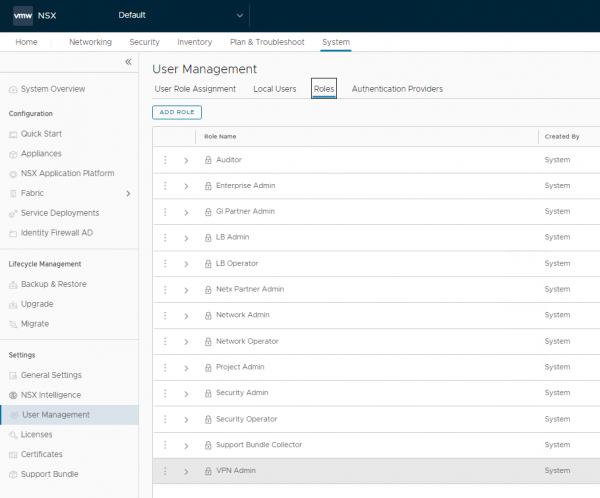
In NSX you can grant user access to different roles. Previous versions just allowed you to limit the access for specific parts. Meaning when you grant a user to the ‘Security Admin’ role, that user is able to change the entire Security configuration. Not only for its own team or tenant, but also for the others within the environment. That isn’t a preferred situation. They should only be able to create and manage their own network and distributed firewall configuration.
Larger companies and service providers asked VMware to limit the configuration access to their own items or sub-sets. Through NSX Projects, VMware has made this possible.
NSX Projects in the GUI
The first place you’ll notice if anything has changed on the NSX Projects is in the GUI. After logging in with an admin account, you will see a new dropdown (top left of your screen).
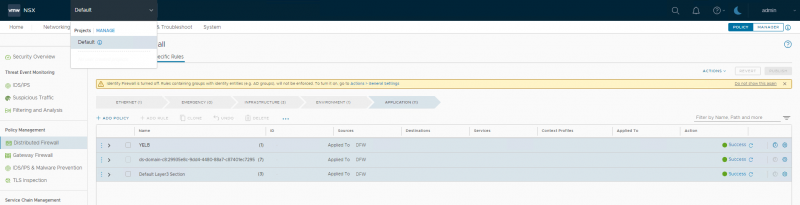
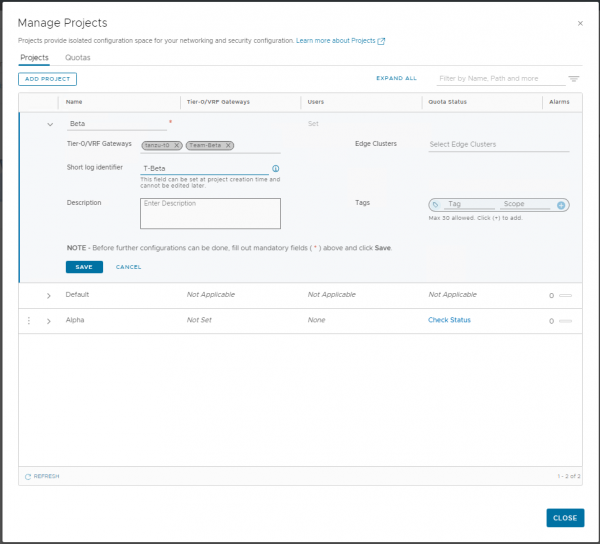
This is the place to create and manage the different NSX Projects by clicking ‘Manage’. Initially there is only a “Default” project, but let’s add some projects to see how it works.
If you want a team or tenant to also have its own Tier-0 router, you should create this in advance. I didn’t do this for team Alpha, but I did create one for team Beta.
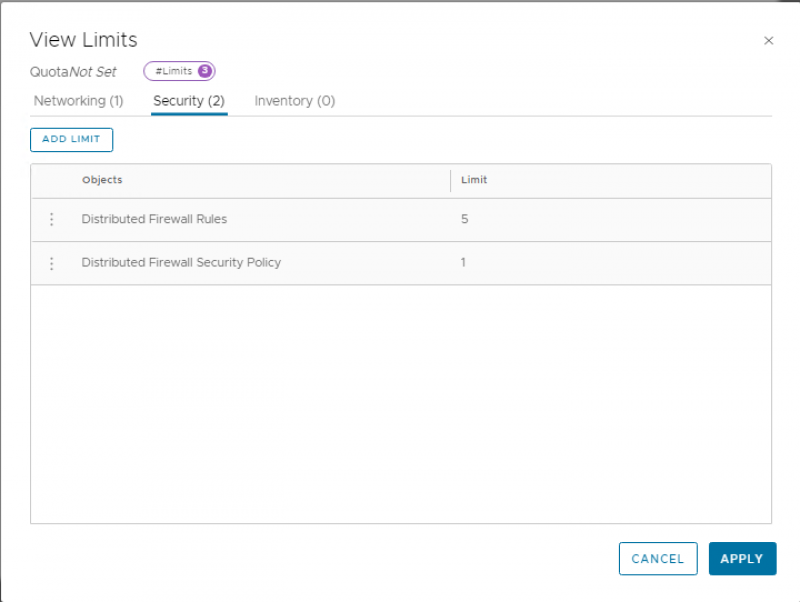
In addition, quotas or limits can be specified to limit the number of objects a team can create within a project. As shown in the screenshot below, this quota allows the project to create 1 Security policy and 5 firewall rules. Remember these numbers because we will need them later for the test.
Now that we’ve created the NSX Projects, we can add user access. This can be done thru the normal way, by granting a user. When you’re granting a role to a user, the scope of the role can be selected and applied only to an NSX Project. For some roles the scope of the role is ‘ALL’ and for some roles it can be configured to a specific project. For example, for global roles like the ‘Enterprise Admin’ and ‘Auditor’ role the scope is set to ‘ALL’. The following roles allow scope can be set to a specific NSX Project:
- Project Admin
- Network Admin
- Security Admin
- Network Operator
- Security Operator
The ‘Security’ and ‘Network’ roles grant the same access as normal, but are now confined to the boundaries of the NSX Project. The new Project ‘Admin’ role functions as an admin role within the projects Networking and Security.
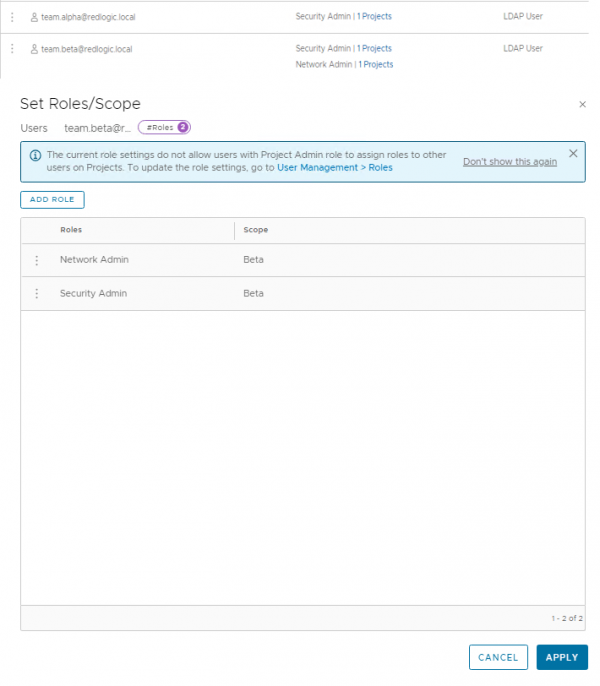
For this blog I’m granting the Alpha team the ‘Security Admin’ role and the Beta team with both admin roles. As shown in the combined screenshot below.
Before diving into the NSX project, there is a list of available features that are supported in it. For example, Overlay networks are supported, but VLAN backed segments are not. Probably because the VLAN must also exist on the physical network. This requires permissions outside the project and NSX. The complete list of features can be found here: VMware list
More on using a VLAN backed segment within an NSX Project later in this blog (Resource Sharing).
Security Admin
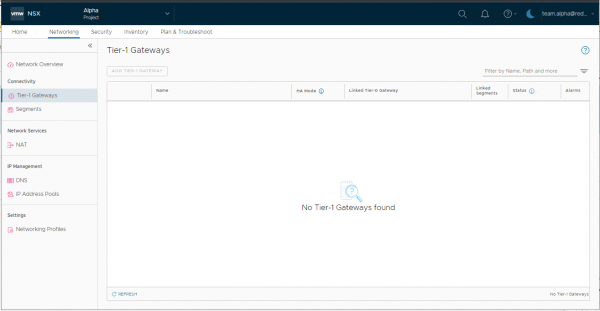
When a team Alpha user logs in to NSX, the user cannot create a Tier-1 gateway because they only have the ‘Security Admin’ role set. The user will also not see any of the pre-existing Tier-1’s in the environment.
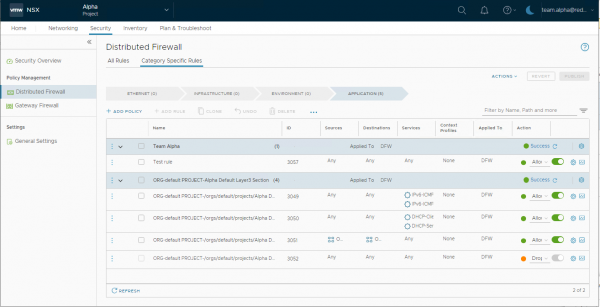
The Security screen allows the user to see the default section created during the creation of the NSX Project and allows the user to add an initial Security Policy in the rule base. The rules that are created by default, include rules to allow DHCP traffic as well as communication within the project and block all other traffic.
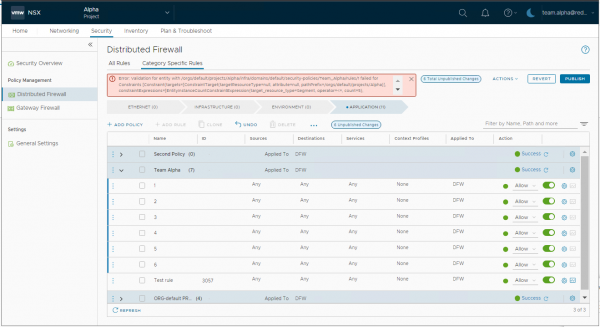
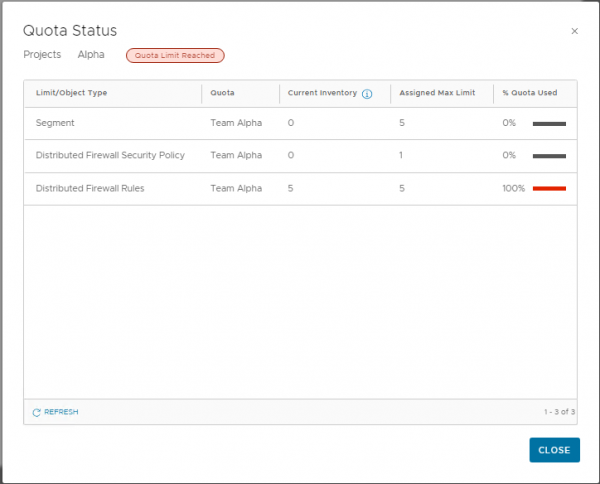
Although this NSX Project has some limits and quotas set to the project, in this version of NSX the user can create more than one Security Policy (set in the quota), but when the user tries to create more than the configured 5 firewall rules, publishing failed. The error isn’t very clear on what the issue is, but if you know the limits and you see the words “constraints” and “count = 5”, that should give you some indication. The limit of 5 firewall rules includes the 4 rules that are created by default, so don’t set this limit too low.
The status for the limits and quotas can also be viewed from the NSX Project manage page, by clicking on ‘Check Status’ under Quota status. The limits can then be viewed as shown below. Here you can also see that the Security Policy has not been counted.
Although this user can create and modify the security components, it cannot create any networking components. So for now, we can’t see how the firewall rules are applied to a virtual machine, since we can’t create any network resources. Fortunately, VMware has added the option to share resources from the default scope or project.
Resource Sharing
With the resource sharing option, located under Inventory, it is possible to share, for example, a segment from the default scope to one or more NSX Projects. As shown in this example, I shared a segment to both NSX Projects.
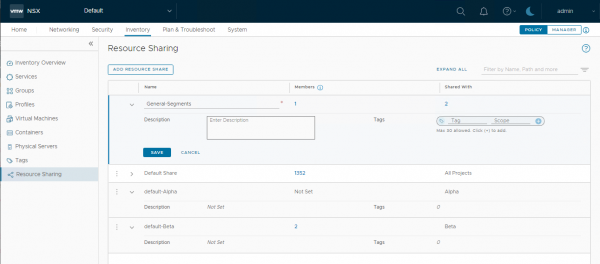
When viewing the shared resource from the project, remember to check the “show Shared Object” checkbox at the bottom of the screen. By default, the shared resources are not visible.
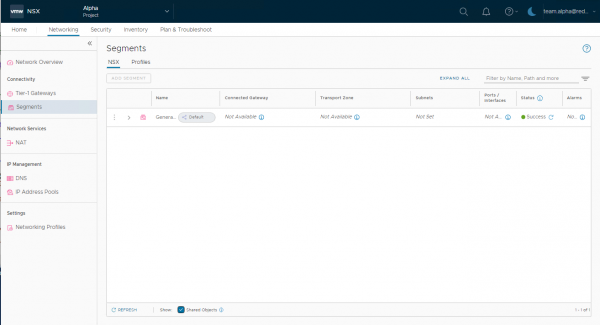
Also note that the ports and transport zone are not available as they have to be explicitly shared with the project before they are available. But more about that in another blog. In the following parts, I’ll dive a little deeper into the networking and security features of NSX Projects.
Hope you enjoyed reading this overview of NSX Projects. If you have any questions or want to see some more? Let me know by leaving a message below.
 LinkedIn
 Twitter
Questions, Remarks & Comments
If you have any questions and need more clarification, we are more than happy to dig deeper. Any comments are also appreciated. You can either post it online or send it directly to the author, it’s your choice.