


Leave us your email address and be the first to receive a notification when Robert posts a new blog.
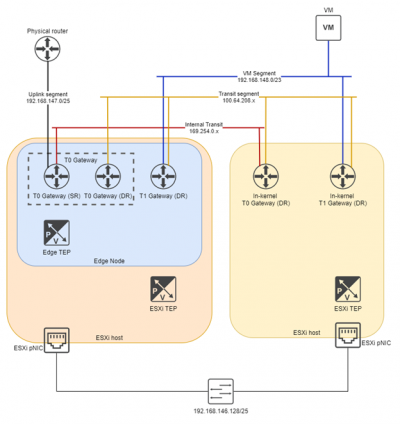
In essence, this is what we're going to build today and the next time:
Step 1: Segments
Before deploying gateways and Edge nodes we will need 2 segments. It may seem a bit the other way around, deploying segments before we have any network infrastructure, but these are part of the infrastructure.
The segments we need are the transit network for the T0 gateway, and a trunk for the Edges. Especially this last one is interesting, because that fixed a big issue for me. The reason is the following:
In NSX-T 3.1 we can have the Edge TEP in the same subnet as the ESXi host TEP, which simplifies our deployment. Now we can have simply a TEP network, rather than seperating them in ESXi host TEP and Edge TEPs. Nice! But for that to work we need to connect the Edges to an NSX-T segment. I found out first hand that having a VDS portgroup does not work. Luckily I found this excellent post which talks about that (thank you, Shank!).
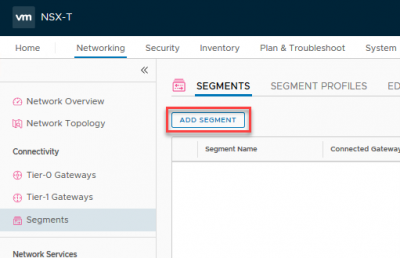
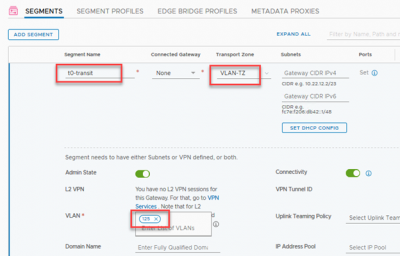
Go to 'Networking' - 'Segments' and click 'Add Segment'.
The amount of options here can be a bit overwhelming, but we only need to set 3 things: the name, the transport zone, and the VLAN setting.
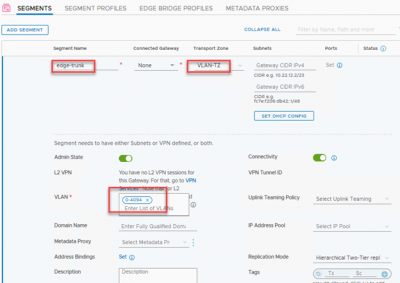
Because this is the segment we will connect our Edge nodes to the physical world, we need to be part of the VLAN transport zone. And since this is used for both inter-TEP communication as well as the uplink communication, we want to have a trunk carrying our VLANs. For security's sake you can limit this, but I'm not too worried about that.
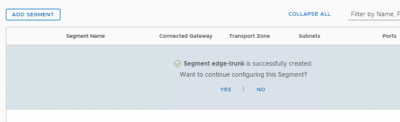
The save button is located below, scroll down a bit. After, it will ask if you would like to continue configuring this segment, but we've done all we needed to, so click 'no'.
The other segment we need is our T0 transit segment. Click 'add segment' once more and fill in the details. I will connect this T0 to a transit network that is tagged with VLAN 125, so I will add that here.
Then, click 'save' and then 'no' when asked if we want to continue configuring this segment, because we're done for now.
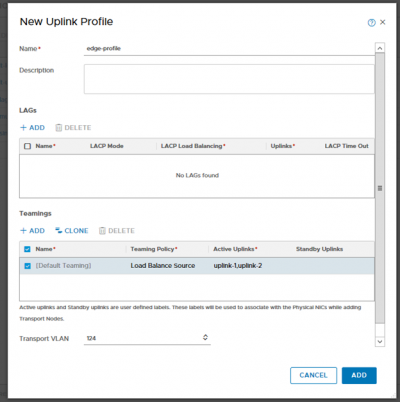
Step 2: Uplink Profile
Again? We already did this! Yes, but we will create a seperate one for the Edge uplinks. To be fair, for this setup it will be the exact same profile. But from experience I can tell you that you should always create a profile for one specific purpose. Should you need to change anything in the future, it will only affect that specific part, not the entire environment. The VLAN here is the one for all the TEPs.
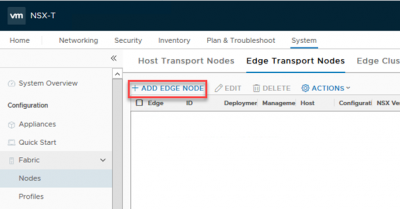
Step 3: Edge nodes
Edge nodes come in 2 shapes: bare-metal and VM formfactor. Usually you would see the latter, the prior are mostly when performance is a very high requirement.
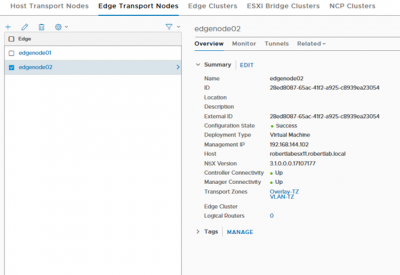
I will deploy 2 Edge nodes so that I can create an active-passive T0 setup below. First, the nodes: go to 'System' - 'Nodes' - 'Edge Transport Nodes' and click '+ADD EDGE NODE'
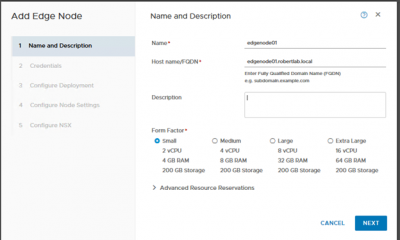
Then fill in the details. I don't need much in my lab, so this will be a 'Small' form factor VM.
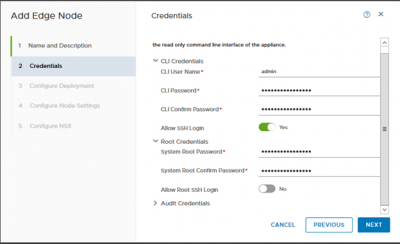
Next we create passwords for the 'admin' and 'root' users. I'd like to SSH using 'admin', so enable that. I'm not using the optional 'audit' user so I'll skip that.
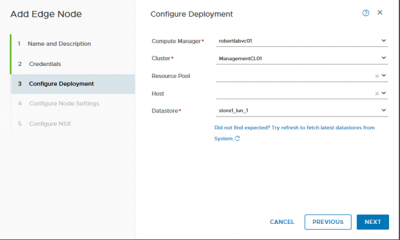
Specify where we want to deploy it; the vCenter, our management cluster, and the datastore.
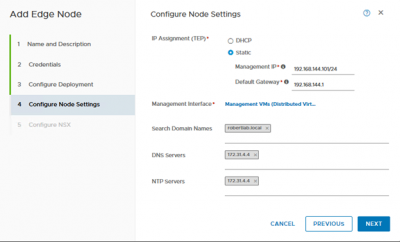
The IP address in the next window is for management only. This is the IP where you would SSH to, this is the IP that you should have a DNS name for, stuff like that.
And finally we configure the N-VDS. Now I can hear you thinking 'but we're using VDS7 so that we wouldn't need the N-VDS'! Yes, but no. The N-VDS we configure here is internal to the Edge node, it won't show up in vCenter. Since the edge nodes have their own TEPs, they need the N-VDS.
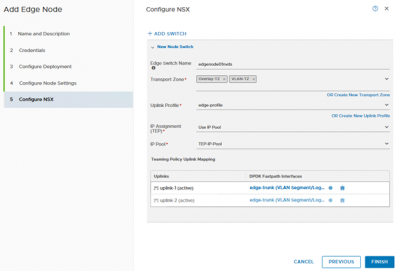
We will give the N-VDS a simple name. Again, we won't see this often, but it's good to be descriptive. We make this Edge node part of both the Overlay-TZ and VLAN-TZ, since it will house our T0-gateway.
The uplink profile is the edge profile we created earlier, and the IP pool is the TEP pool we made a while ago. Because with NSX-T 3.1 we can have them in the same segment, it keeps all the TEPs nice and cozy together. But, we need to connect the uplinks to an NSX-T segment, so this is where we fill in the segments we created earlier.
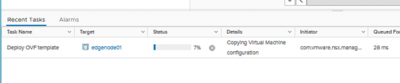
Click 'finish' and we can see the Edge Node VM being deployed in vCenter!
Let's deploy another Edge node so this one won't be so alone (and also so we can cluster them together).
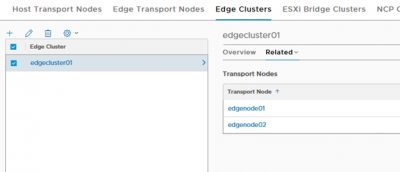
Step 4: Edge Cluster
In order to do anything with our edge nodes, we need to add them to a cluster. This cluster can even consist of just one edge node, oddly enough! This part is super easy.
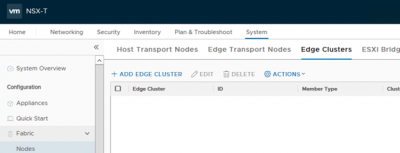
Go to the 'Edge Clusters' tab and click '+Add Edge Cluster'
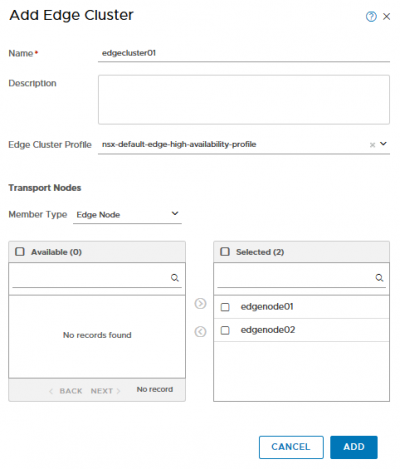
Then simply fill in a name, click the default profile, select the edge nodes in the 'available' column and click the arrow moving them to the right! That's it!
The profile we use here doesn't have a lot of configurable options, but it is interesting enough to show:

BFD stands for bi-directional forwarding detection and is a great mechanic that makes the failover detection for each edge node in the cluster very dependable. It essentially just is a heartbeat. If you need a quicker failover, create a new cluster profile and apply that instead.
With our edge nodes deployed and our edge cluster configured we're finally ready to deploy gateways!
 LinkedIn
 Twitter
Questions, Remarks & Comments
If you have any questions and need more clarification, we are more than happy to dig deeper. Any comments are also appreciated. You can either post it online or send it directly to the author, it’s your choice.