


Leave us your email address and be the first to receive a notification when Robert posts a new blog.
Setup
Before we get started with NSX-T let me show you the environment I've set up for this purpose. It's all nested ESXi using William Lam's excellent nested ESXi OVA's. It's all vSphere 7 and using vCenter 7, we're deploying NSX-T 3.
I'm starting with 3 hosts in a management cluster , and 2 hosts for compute resources. For now I've not deployed any KVM hosts (yet).
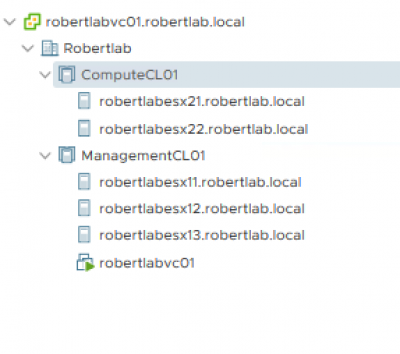
As you can see, I haven't deployed any workloads either, I'm really starting from scratch here.
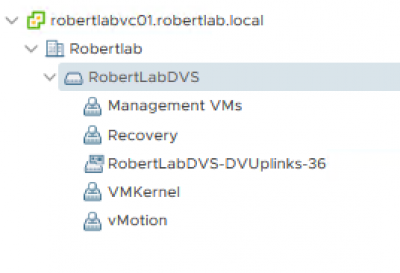
I have deployed one Distributed vSwitch (DVS, or virtual Distributed Switch, vDS), version 7.0. It is necessary to use this version because it allows us to leverage the NSX-T Portgroups.
Each host has 4 "physical" uplinks (they're nested ESXi, so physical is dubious). Two of the uplinks are allocated to the DVS. The other two are connected to a standard vSwitch (VSS) for the physical iSCSI storage (this really is a physical SAN).
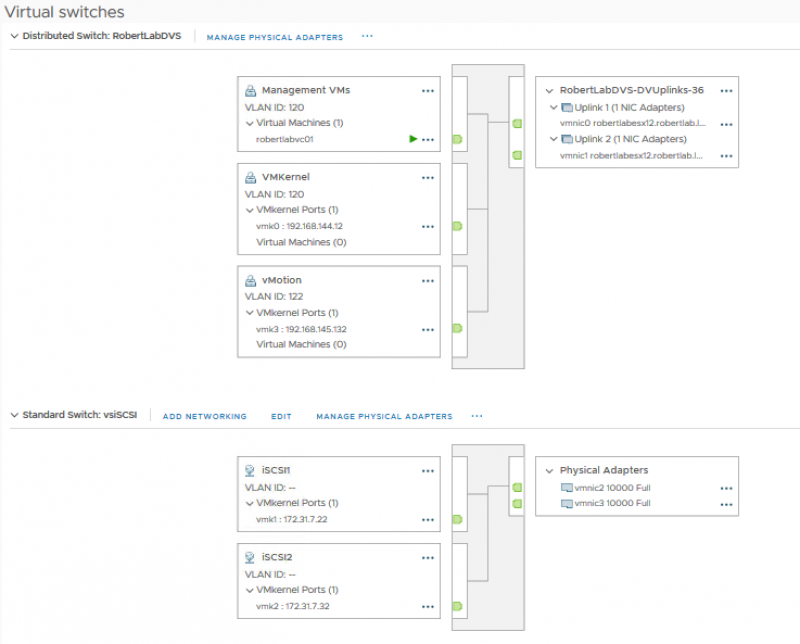
The uplinks are connected to the physical ESXi via trunk ports, which in turn connect to a (virtual) VYOS router. This, finally, gives us north/south connectivity.
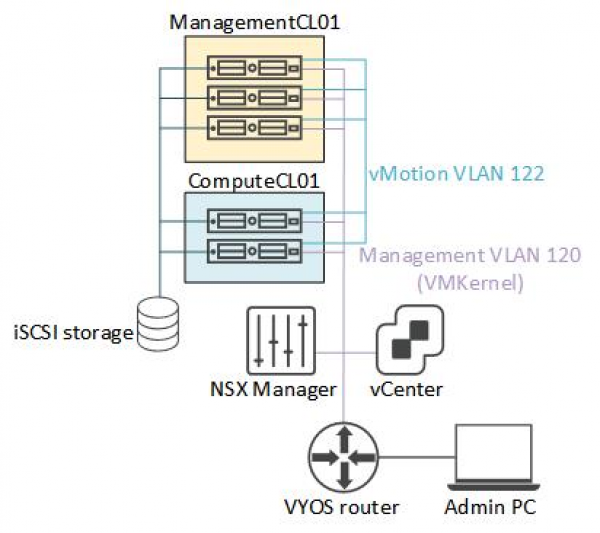
A picture says a thousand words, so here is a diagram:
Deploying the NSX-T Manager
With our environment clean and ready to go, we can deploy the first NSX-T Manager.
As with NSX-V controllers (and crowds) the NSX-T manager normally comes in clusters of three, but for lab environments it is OK to just deploy a single manager. You'll get some warnings, but they can be safely ignored, it will not impact the workings in any way. Do not do this in production, obviously.
The first step is to simply get the NSX-T OVA and deploy it in your environment, following all the steps.
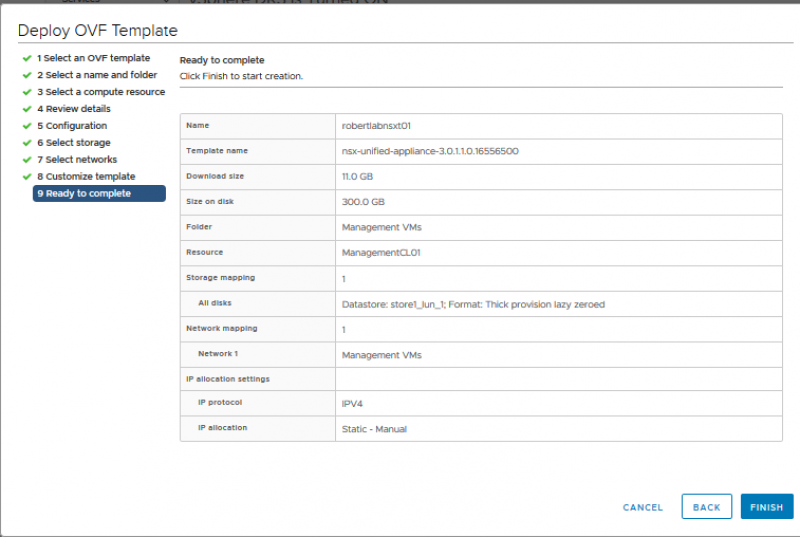
Patiently wait until the deployment is done, then power up the VM, then wait patiently some more. Or be like me and keep refreshing the page until it finally shows up!
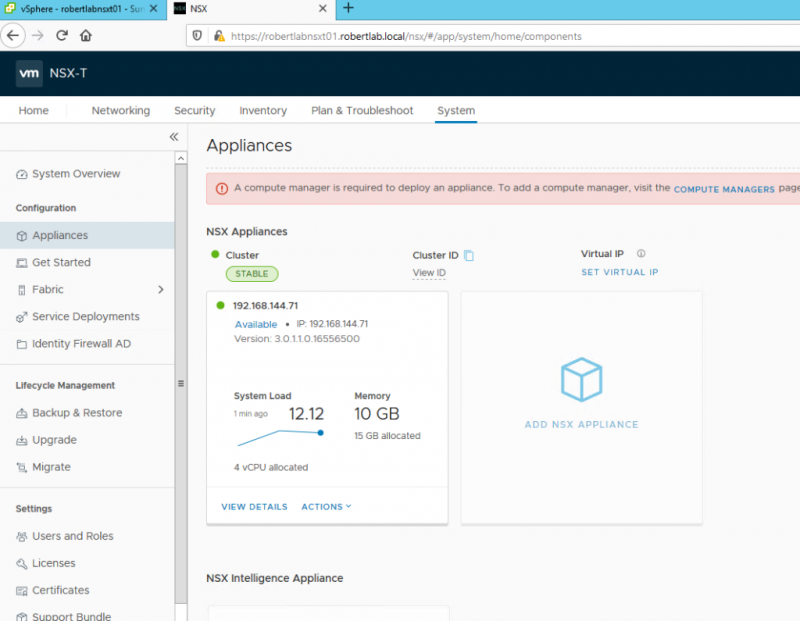
On the System -> Appliances tab you should see a happy one-member cluster of NSX-T managers! Well, with one big warning we're going to address immediately.
The Compute Manager is the vCenter you want to tie your NSX-T Manager to. Simply go to System -> Fabric -> Compute Managers and click '+ADD'. Next, fill in the vCenter details you want to connect to. Click 'Enable Trust', this enables a 2-way trust between vCenter and the NSX-T manager, used for Kubernetes.
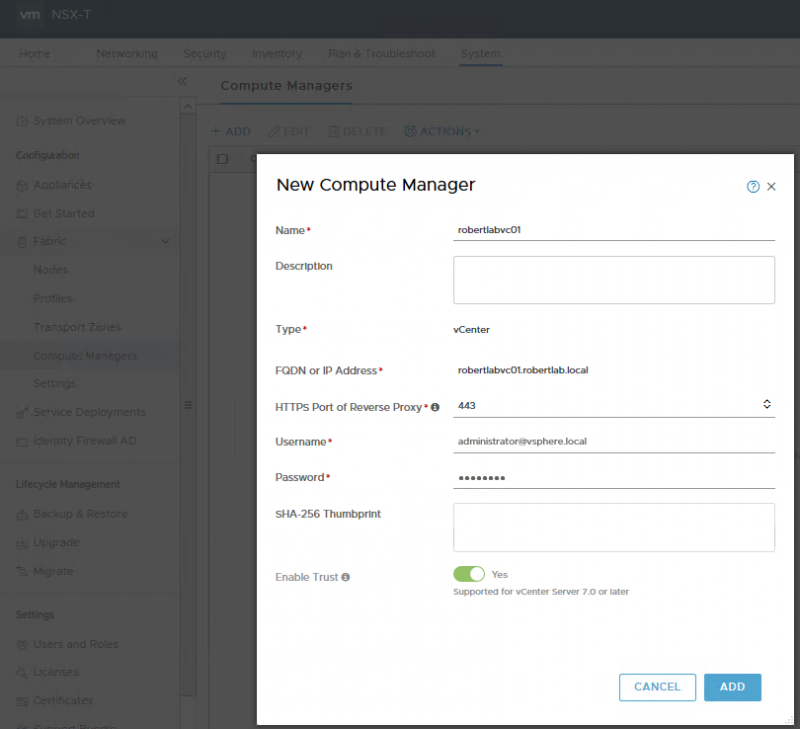
After a few seconds it should show up in the table and become green.
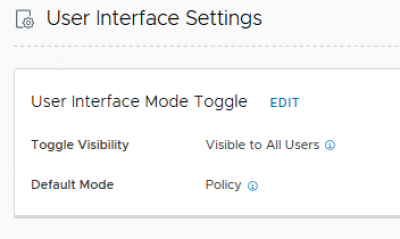
Don't forget to enter your license under Settings. One final protip, go to User Interface Settings and change the Toggle Visibility setting to visible, that way you can swap between the policy/new and the manager/old mode:
And that's it for this post! Next time we'll start configuring our environment with profiles and define clusters and nodes, stay tuned!
 LinkedIn
 Twitter
Questions, Remarks & Comments
If you have any questions and need more clarification, we are more than happy to dig deeper. Any comments are also appreciated. You can either post it online or send it directly to the author, it’s your choice.